

How To Clean A Logitech Marble Mouse
Your trackball mouse can become admittedly covered in gunk. With a lot of moving parts, that spells trouble for your dear trackball.
More moving parts means more than parts to clean and you want your trackball to work in tip-top shape.
Information technology'south fourth dimension to make clean that layer of dried, sticky Mountain Dew and Doritos dust from your trackball mouse.
How To Clean a Trackball Mouse
Cleaning a regular mouse usually just entails wiping down some surfaces.
A trackball, even so, takes a picayune fleck more than endeavor.
Starting with wiping down surfaces and cleaning the bearings, you also accept the pick to open up up the trackball for deeper cleaning and even modification if need be.
Get-go, let's embrace what tools we'll need, followed by some techniques for cleaning and maintaining your trackball.
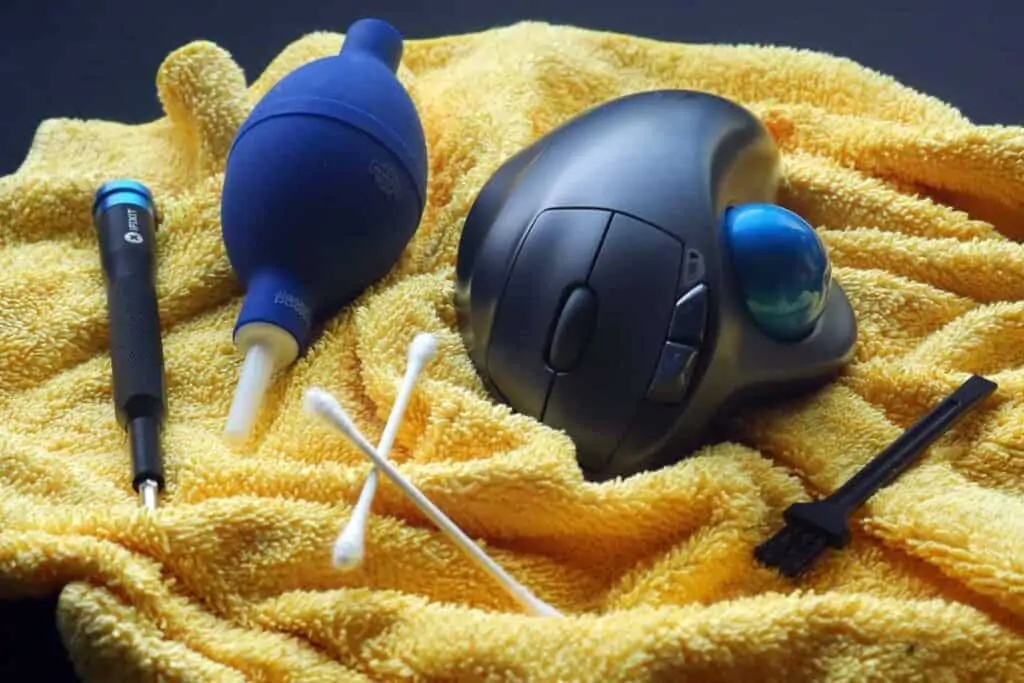
Recommended Tools For Cleaning Your Trackball
01. Microfiber – for wiping down the plastic surfaces.
02. Q-tips – for cleaning the bearings and hard to attain areas
03. Air Duster – to accident away debris from housing and sensor
04. Brush – for cleaning the bearings and fine crevices
05. Minor Screwdriver (optional) – to open the trackball for deep cleaning
06. Tweezers (optional) – for aid peeling stickers and disconnecting ribbon cables.
Now that we've got everything we need…
Permit's become started
Brand sure your trackball is turned off or unplugged, with batteries removed, before proceeding!
The Pre-Make clean Wipedown
Usually, this is the only step required to make clean a mouse. For a trackball, it'south the showtime of a few.
If your trackball hasn't been wiped downwards in a while, get your microfiber towel and wipe down the surfaces of your mouse. Make sure your towel is only slightly dampened, and not saturated with liquid.
A clammy microfiber might work better hither if your mouse is particularly dirty, glutinous, or dusty. Avoid using as well much water.
If using a disenfectant spray, make sure it is plastic safe and spray the towel, not the trackball.
Avoid using alcohol or harsh solvents to avoid unwanted reactions to the plastic, articulate coat, and stop.
How to Clean A Gluey Trackball
If your surfaces are gross, then chances are your trackball is even more grody.
If your ball is sticky or overly oily, it 'south a good idea to clean the ball itself and everything in the housing loving cup beneath information technology.
Step 01. Pop out your ball
First things first. You'll demand to free the ball from its loving cup.
Depending on your trackball, this could mean using a pen or finger to pop the ball out through the admission pigsty, or past just flipping your device upside-downwards and letting gravity do the piece of work.
Some may even have a fancy eject button. Whichever way you do it, just brand certain your brawl is free.
Footstep 02. Wipe Down with moisture microfiber
Now that we're complimentary-balling, grab your microfiber towel and wipe downward the brawl if it'southward overly pasty or oily.
While oils from your skin and fingers practise help the ball ringlet smoothly, as well much will attract dust and crud.
A microfiber, dry out or clammy, volition assist remove anything and everything from the surface.
Earlier we put the ball back in its socket, we demand to make sure the socket is clean likewise.
How To Clean Your Bearings and Sensor
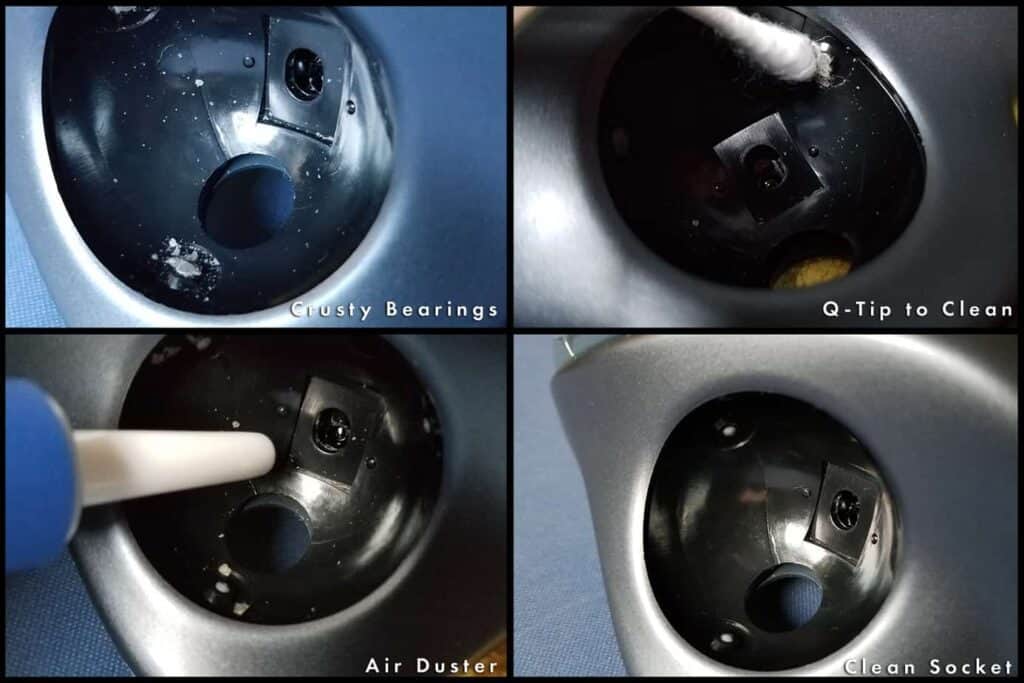
Under your trackball, in the socket cup, you lot tin detect iii ball bearings and an optical or laser sensor.
Over time, and peculiarly in dustier environments, the bearings may attract a ton of dust, clay, crud, oil, and any else finds its way under the trackball.
It'due south of import to clean these areas regularly to maintain a shine trackball.
If your ball isn't already removed, remove your ball. Y'all may observe that you need to clean under the ball more oft than the ball itself.
Step 01. Clean the bearings and sensor
Using a q-tip, small brush, and/or the same microfiber from before, clean off any and all crud on top of your bearings.
Some bearings scroll, and some do not, so you may find yourself cleaning between the bearing and housing with a castor or toothpick if the other methods fail to go far the nooks and crannies.
If you take an air squeegee, use information technology to blow abroad whatsoever debris that may have institute its style into the sensor crenel. It's of import to ensure that not only your balls rides on clean bearings, merely the sensor tin can read the ball clearly as well.
Step 02. Final Wipedown
Using your microfiber, give the cup 1 last wipedown before putting the brawl dorsum in its housing.
Step 03. Replace the ball
Pop the refreshed brawl back in its clean socket.
Now you're ready to ringlet with a clean trackball.
Talk almost a hole-in-one.
Exam how well it rolls. If it feels rougher or just less smoothen in general, information technology could be an indication that your ball is oil-free.
You accept the pick of waiting for your fingers to natually oil the brawl over again, use some oils on your skin or face, or even lubricate the surfaces of the bearings with some ptfe-based lubricant.
Deep Cleaning
If your trackball needs a particularly deeper cleaning or refurbishment, you may want to consider opening up your trackball.
Keep in listen this will likely void your warranty if it isn't expired already, and so continue at your ain risk.
Pace 01. Take your Trackball Apart
Earlier proceeding, again make sure that your trackball is off, unplugged, and batteries removed.
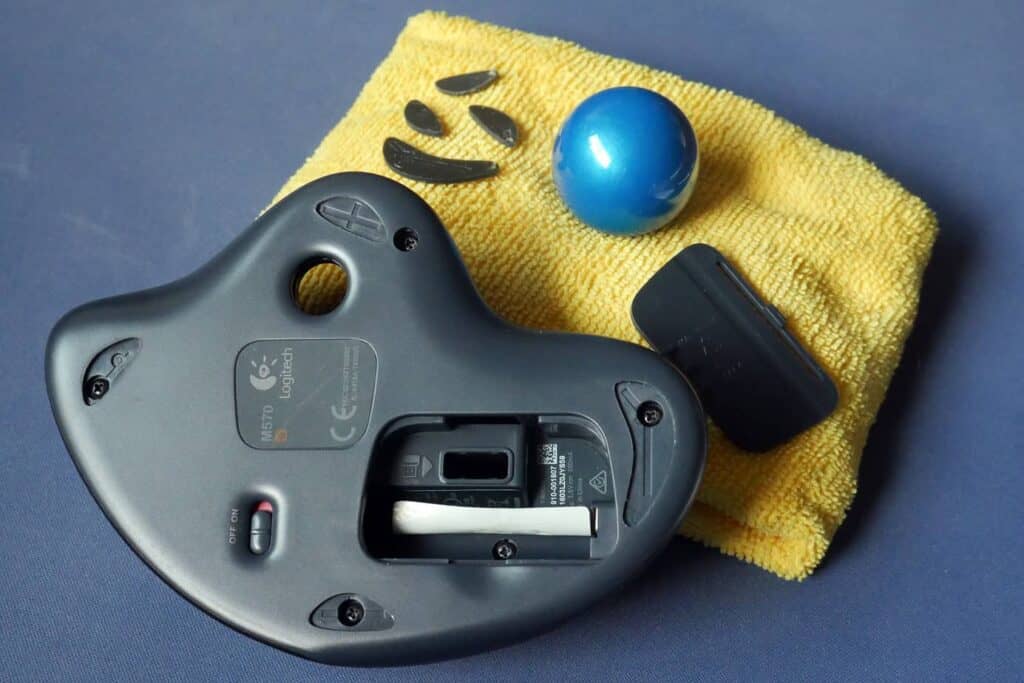
– Remove rubber feet and stickers
When checking for screws, always brand sure to check under any safe anxiety, mouse skates, and behind battery doors and stickers.
Remove the prophylactic feet, and feel for whatever surface changes which may point holes underneath the sticker.
Zip-ties Tweezers are helpful to grip the sticker if your fingers are too big for the battery compartment.
On the Logitech M570, at that place are a total of 5 screws: one screw is visible, iii screws are nether rubber feet, and one screw is hidden underneath the bombardment compartment sticker.
– Disengage screws
Using a minor screwdriver, most likely philips head #i, loosen and remove all screws.
A magnetized screwdriver will exist helpful in managing the pocket-size screws.
Keep your screws in a small dish or container nearby where they won't get lost or scattered.
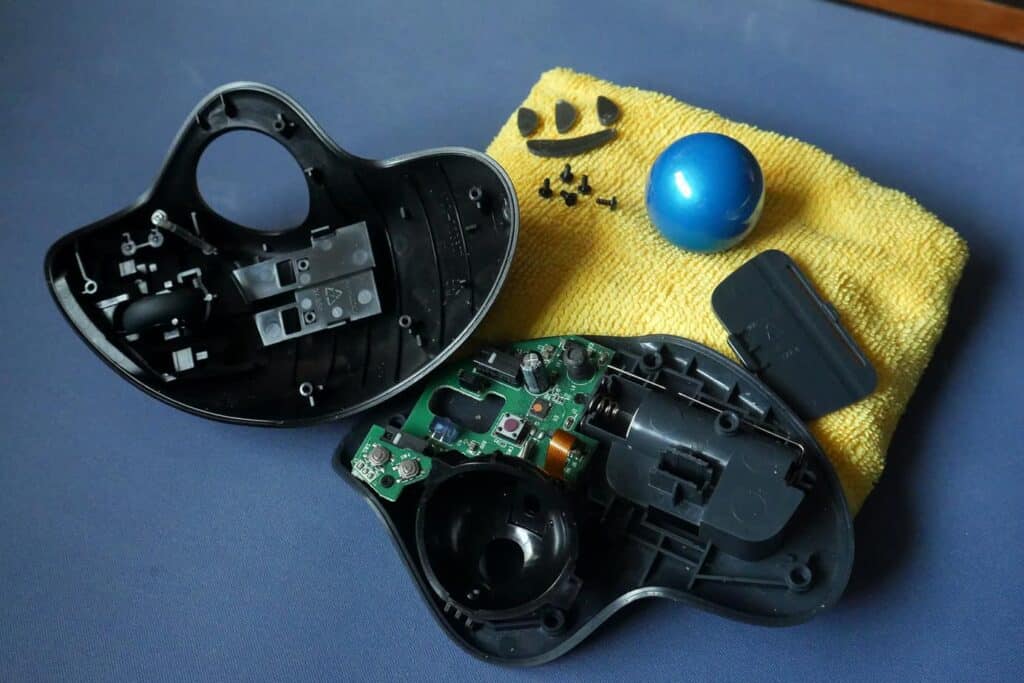
– Crevice it Open up
Fourth dimension to open your mouse.
Run a fingernail, card, guitar pick, or similar tool along the edge and seam of the trackball housings.
Slowly become effectually the edges until the two halves are freed, and open up your trackball, beingness careful not to detach any cables which may be connected.
– Accept a Moving-picture show of the Within
If you're planning on disassembling the components farther, take a flick of everything so yous know how the puzzle pieces fit back together.
Step 02. Dismantle (optional)
Carefully disassemble the components, being careful not to damage any cable connectors or small components.
Y'all may need to remove more than screws, or use tweezers to help with small parts.
Pace 03. Clean
Whether or not y'all decided to take your components apart, it is now time to dust and clean the inside of the trackball mouse.
You can use the aforementioned tools as the basic cleaning we listed above.
Step 04. Reassamble and Profit
At present we put everything back in its correct place.
After you've reassembled everything, give your device a final wipedown and bask in refurbished trackball glory.
When you have a newly refreshed device that looks and feels make new, it tends to make you feel and work better likewise.
Salvage some coin on a new device, and profit from increased productivity instead!
Tips For Cleaning Logitech Trackballs
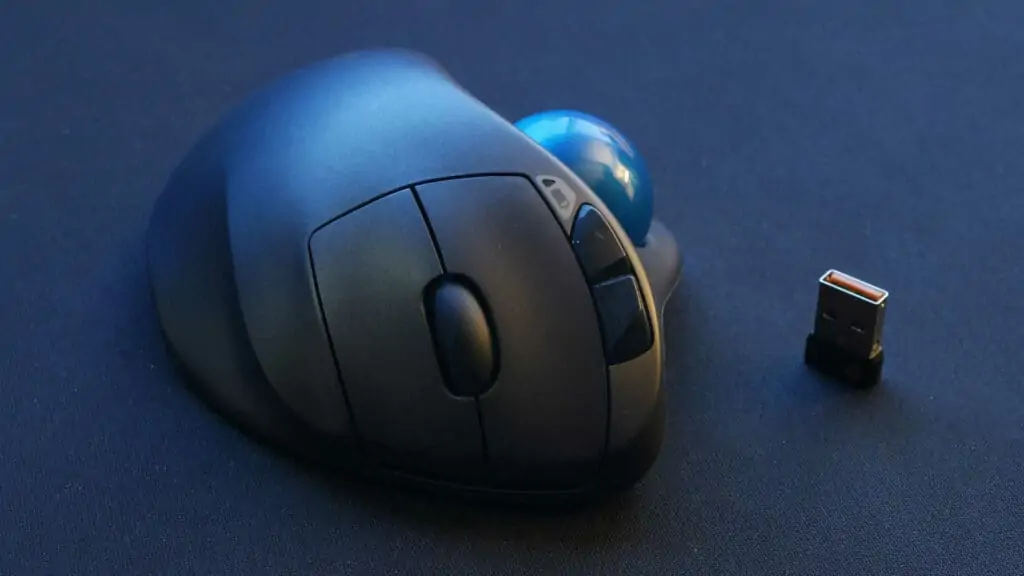
Logitech trackballs are fairly straightforward in their associates and construction.
The bearings practise not roll and are not removeable.
When cleaning these bearings you may desire to endeavour using a brush, toothpick, sculpture/dental tool, or like needle-like tool to become between the bearing and its housing.
Tips For Cleaning Kensington Trackballs
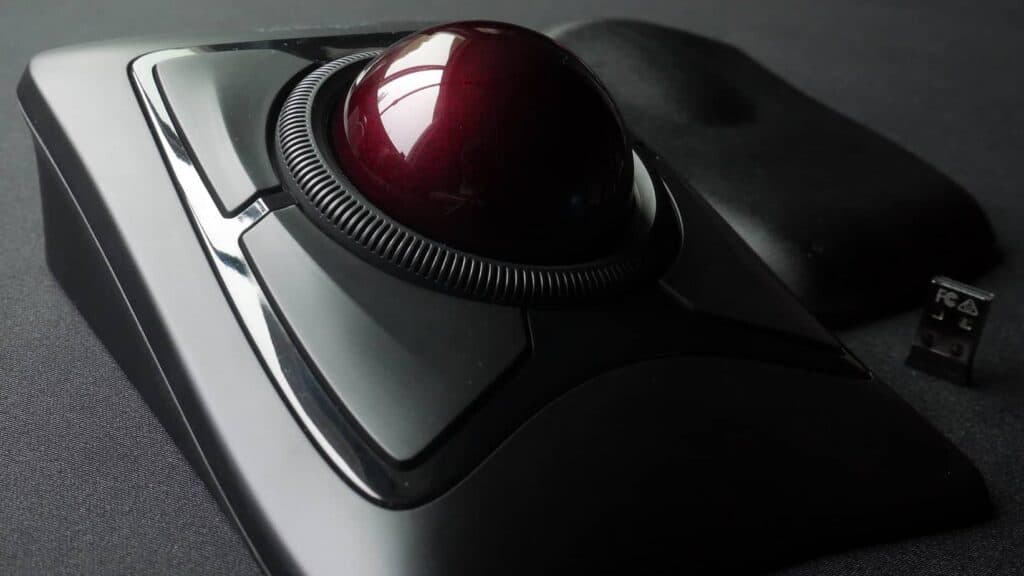
Kensington trackballs are slightly more complex in their construction and associates, and there may be more screws to remove on the within.
Once within you may discover a magnet that is used for resistance on scrolling – remove magnet for less resistance and "way switch" ratchet that is normally associated with Kensington gyre rings.
Kensington trackballs all rely on gravity to go on the ball in place, except for the Ergo Fit Pro which includes an "Eject" button. Kensingtons typically don't have an "access hole".
The hardest part to clean on a Kensington is the scroll band itself.
Over time and as your oils accrue, the grooves may fill up with dust, grime, and debris.
Utilise a brush, microfiber, and toothpick to help make clean and maintain your scroll ring.
Tips For Cleaning Elecom Trackballs
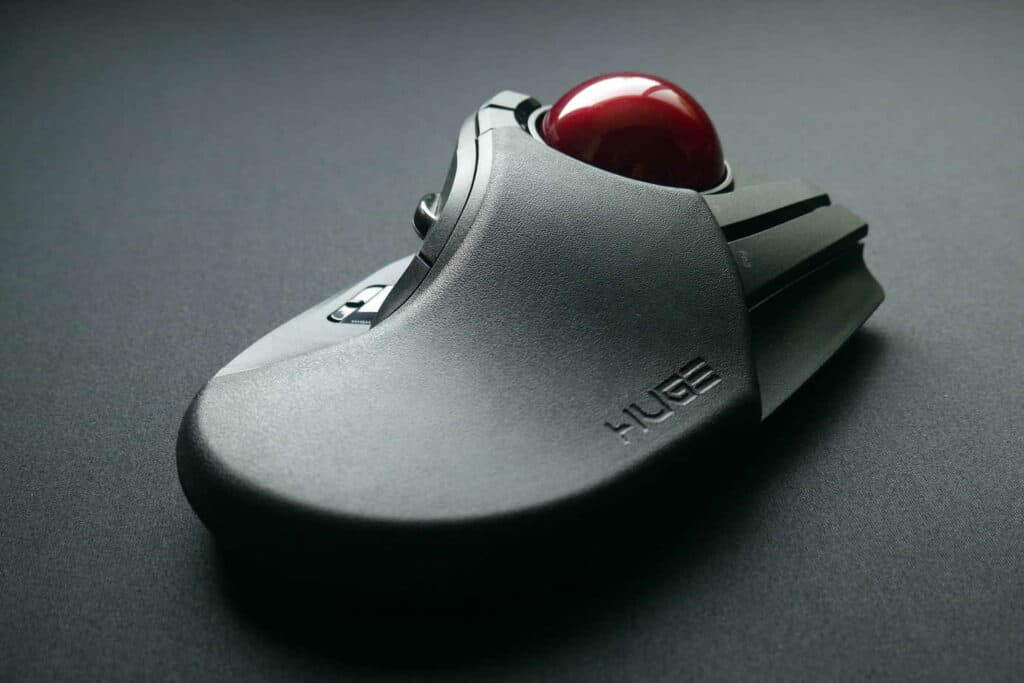
Elecoms are the most complex of the three in their construction and assembly. The main differentiating feature of Elecom is that the bearings are removeable and replaceable.
Before unscrewing the cup housing, make sure to add together tape to the exposed bearings and bottom housing beginning.
This volition assist prevent the bearings from escaping, and they stick on the tape which makes for easier management.
You can find replacement 2.5mm bearings online made from a variety of materials. You can likewise clean and lube the bearings more thoroughly and straight.
Being able to swap custom bearings makes Elecom trackballs nifty for enthusiasts to tinker with.
Can Your Trackball Be Likewise Muddied To Save?
Usually, a trackball is very easy to clean and maintain, and even refurbish.
The but part which may demand replacing are bearings, switches, and the ball itself. Worn ABS plastics which may exist shiny and slick tin can be fixed with a new coat of paint, plastidip, or vinyl stickers and skins.
If you tin't solder and your trackball has stock-still bearings, your merely DIY pick may be a brawl replacement.
Non all balls are created equal. Some gyre smoother than others. Some aren't perfectly spherical.
Some develop surface imperfections and get damaged the more than you lot use them.
If you're on the move and throw your trackball in a purse with your other gear, the ball may be gouged or marred, making it hard for the sensor to read.
If skin oils aren't enough to keep your ball rolling shine and without problems, you lot have options.
Thankfully you tin not just brush on a thin coat of lubricant on the bearings to make the ball smoother, you can also supervene upon the brawl itself.
You accept the choice of real trackballs, dexterity balls, and fifty-fifty snooker balls depending on your trackball's diameter.
If all else fails, consider a new trackball mouse entirely. An Elecom or Logitech, perhaps?
Conclusion
Stuff happens. Mice go dirty, and that's especially true for trackball mice.
Maintaining a clean mouse is important not only for hygiene , only also for condolement, performance, and device longevity.
Hopefully with this guide, you won't have whatsoever issues with sticky balls or filthy mice.
Other Recommended Reading
How to Employ a Trackball Mouse More Efficiently
How To Choose A Trackball Mouse
Can You Game With A Trackball Mouse?
Thumb vs Finger Trackball Mouse: Which Is Better?

Source: https://switchandclick.com/how-to-clean-a-trackball-mouse/
Posted by: tolartherect.blogspot.com
0 Response to "How To Clean A Logitech Marble Mouse"
Post a Comment